
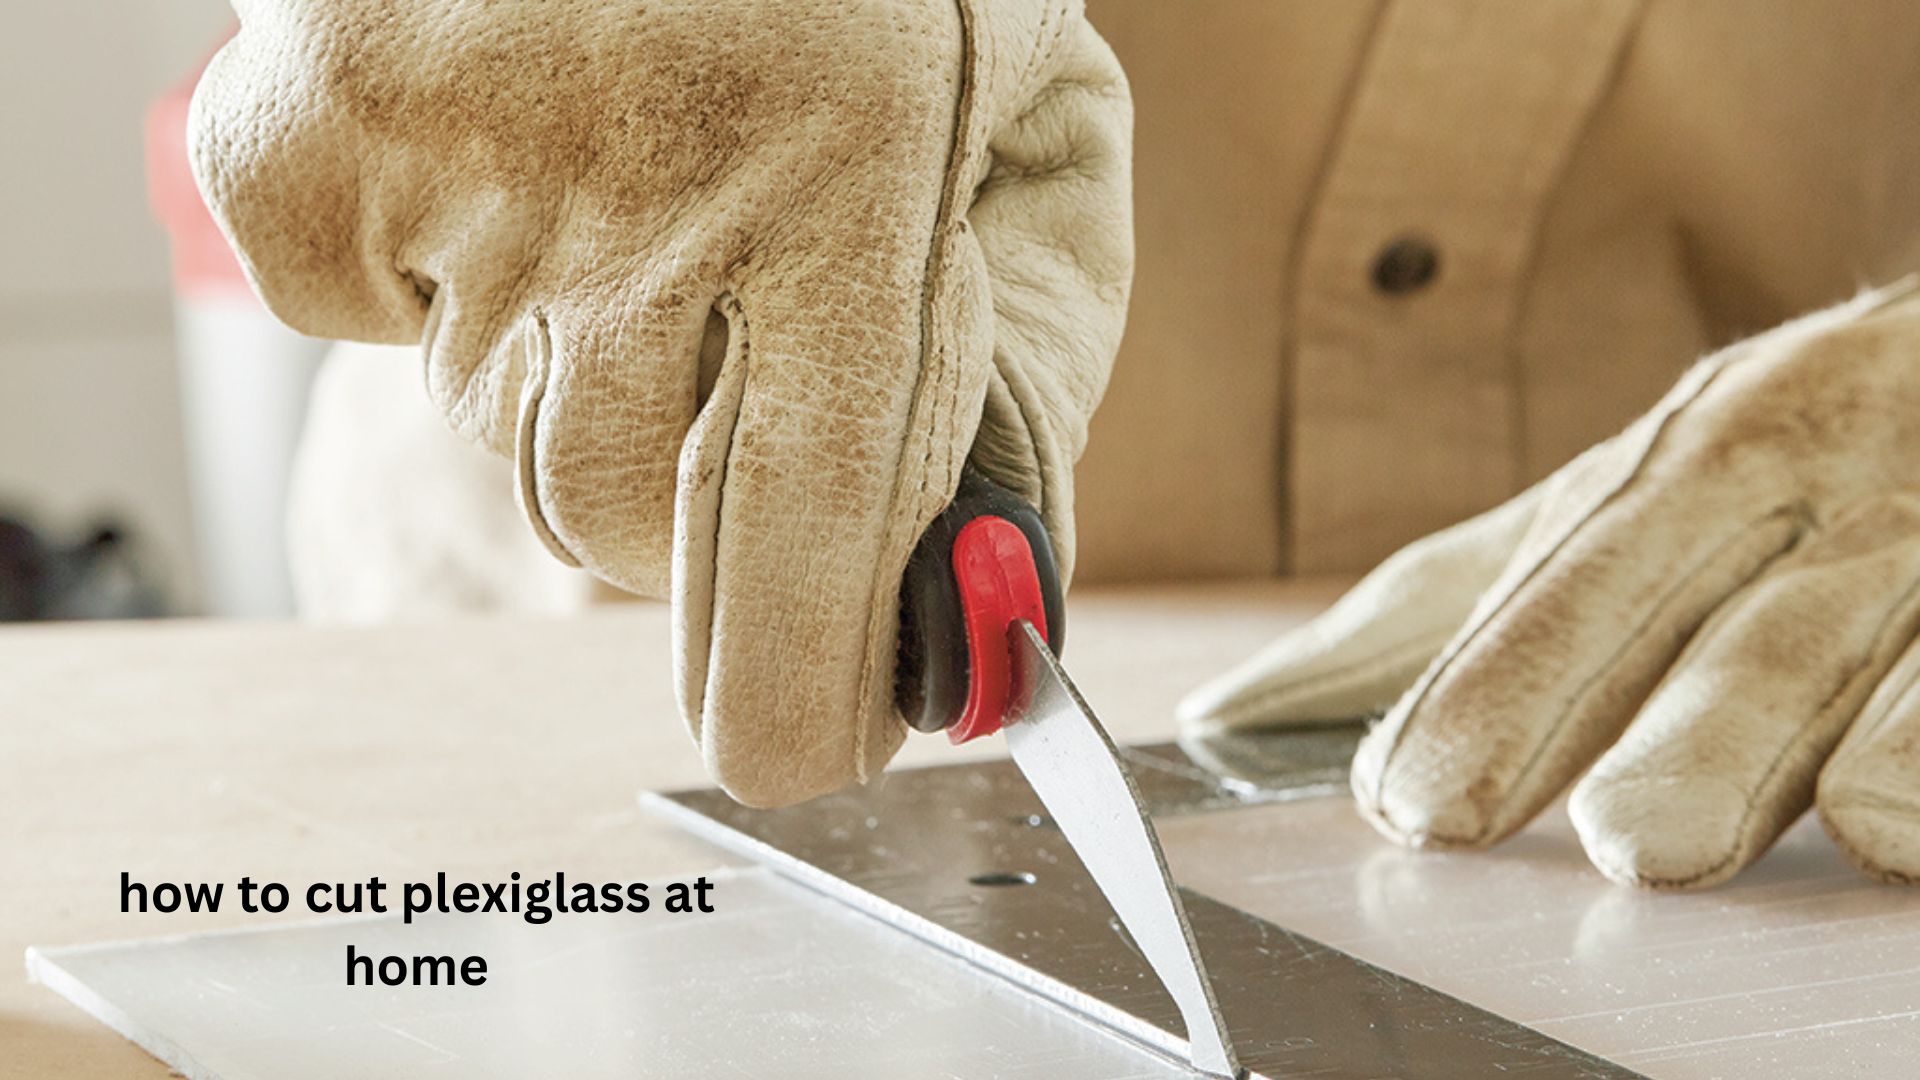
Cutting a sheet of plexiglass can seem intimidating the first time you try it. The material looks like glass, feels more forgiving than glass, and yet one wrong move can leave you with a cracked edge, melted plastic, or a sheet that is slightly too short for the job. If you are wondering how to cut plexiglass at home, the good news is that you usually do not need a workshop full of expensive tools.
The best cutting method depends mainly on the thickness of the sheet, the shape you need, and the tools you already have. Thin acrylic can often be scored and snapped by hand, while thicker sheets are better handled with a circular saw, jigsaw, or table saw fitted with an appropriate blade.
In this guide, you will learn which method works best for different situations, how to make accurate cuts, how to prevent chipping and melting, and what to do when the cut needs to look clean enough for a finished project. I will also cover several practical details that are easy to overlook, including why protecting the surface matters and why cutting slightly oversized can sometimes produce a much better result.
What Is Plexiglass?
Plexiglass is a common name for clear acrylic sheet, a lightweight plastic often used instead of traditional glass. It is transparent, relatively strong, and much easier to drill, cut, and shape than ordinary glass.
You may encounter acrylic under different names, including:
- Plexiglass
- Acrylic sheet
- PMMA
- Acrylic glass
- Perspex in some markets
Although acrylic is easier to work with than glass, it is not impossible to damage. It can scratch easily, and excessive heat from a cutting blade can cause the edge to soften or melt.
That is why the goal is not simply to cut through the sheet. The goal is to make a controlled cut without creating unnecessary heat, vibration, or stress.
Can You Cut Plexiglass at Home?
Yes. Most homeowners can cut plexiglass successfully with basic workshop tools.
The simplest options are:
- Scoring and snapping — best for thin, straight cuts.
- Jigsaw — useful for curves and irregular shapes.
- Circular saw — excellent for long, straight cuts.
- Table saw — useful for repeated or highly accurate straight cuts.
- Fine-tooth hand saw — workable when power tools are unavailable.
For a simple piece of thin acrylic, scoring is often the easiest approach. For thicker material, a power saw generally gives you more control.
The important point is to match the method to the material rather than forcing one technique to work for every sheet.
Before You Cut: Measure Twice
A surprisingly common problem with acrylic projects is not a bad cutting technique but a bad measurement.
Before making any cut, measure the opening or finished space carefully. If the plexiglass is going inside a frame, cabinet, window opening, or protective cover, remember that the material may need a little clearance.
A practical approach is to:
- Measure the opening at several points.
- Use the smallest relevant measurement.
- Mark the required dimensions clearly.
- Double-check your measurements before cutting.
- Account for the blade’s cutting width when using a saw.
For example, if you are replacing a broken window panel with acrylic, do not automatically cut the sheet to exactly the same nominal dimensions. The frame may not be perfectly square, and acrylic needs enough room to sit without being forced into position.
A useful trick: make a cutting template
For unusual shapes, make a template from cardboard first.
This lets you test the shape in the actual location before committing to the expensive acrylic sheet. It is especially useful for covers, shelves, machine guards, signs, and custom panels.
How to Cut Thin Plexiglass by Scoring
For relatively thin acrylic, scoring and snapping is often the cleanest home method.
You need:
- A straightedge or metal ruler
- A scoring tool or sharp acrylic-cutting knife
- Clamps
- A stable work surface
- Fine sandpaper for finishing
Step 1: Leave the protective film on
If the sheet has protective paper or plastic film, leave it in place while cutting.
Mark your measurements directly on the film. This protects the acrylic from scratches and makes it easier to see your cutting line.
If there is no protective film, use a low-tack marking method that will not damage the surface.
Step 2: Mark the cutting line
Use a straightedge to create a precise line.
Do not rely on a quick pencil mark if accuracy matters. A small error at the first cut becomes very noticeable when the panel is installed.
Step 3: Score the acrylic
Place the straightedge firmly along the line and draw the scoring tool toward you.
The goal is to create a deep, consistent groove. Do not try to cut completely through the sheet.
Make several controlled passes along exactly the same line.
One of the most important practical lessons is consistency rather than brute force. Repeated passes in slightly different locations create a wider, weaker groove and can make the eventual break unpredictable.
Step 4: Position the sheet
Move the scored line to the edge of your workbench.
The waste portion should extend beyond the edge while the main piece remains firmly supported.
Clamp or hold the sheet securely, but avoid crushing it.
Step 5: Snap the sheet
Apply firm, controlled downward pressure to the overhanging section.
If the score is deep and straight enough, the acrylic should break along the groove.
Do not repeatedly bend the sheet backward and forward. That can create stress cracks that travel away from the intended line.
Step 6: Smooth the edge
The snapped edge may feel sharp or slightly rough.
Use fine sandpaper to smooth it. Sand in controlled passes rather than aggressively grinding the edge.
For a visible finished edge, progressively finer abrasive paper can produce a much cleaner appearance.
How to Cut Plexiglass With a Jigsaw
A jigsaw is one of the most useful tools when you need curves, cutouts, or shapes that cannot easily be scored and snapped.
Choose a blade intended for plastics or a fine-tooth blade appropriate for acrylic.
The basic process
- Keep the protective film on the sheet.
- Mark the cutting line.
- Secure the acrylic firmly to the workbench.
- Support the material close to the cutting area.
- Use a suitable fine-tooth blade.
- Start the saw before entering the material when appropriate.
- Move steadily without forcing the blade.
- Let the blade do the cutting.
- Smooth the edge afterward.
Why jigsaws sometimes melt acrylic
Acrylic can soften when excessive heat builds up.
This usually happens when the blade is moving quickly but not removing material efficiently, or when the operator pushes too slowly and allows friction to build.
If you see melted plastic collecting along the cut, stop and reassess the setup.
Possible causes include:
- Incorrect blade
- Dull blade
- Excessive friction
- Incorrect speed
- Poor material support
- Pushing too slowly
- Cutting too aggressively
The solution is not always “use a faster speed.” The correct combination of blade type, speed, feed rate, and support matters more.
How to Cut Plexiglass With a Circular Saw
A circular saw is particularly useful for long, straight cuts.
For best results, use a blade designed for cutting plastic or another suitable fine-tooth blade recommended for acrylic.
Place the plexiglass on a properly supported surface and secure it before cutting.
A simple technique
Mark the line on the protective film and clamp a straight guide to the sheet if you need a highly accurate cut.
Keep the saw moving smoothly along the guide. Avoid stopping in the middle of the cut unless necessary because restarting can increase the chance of an uneven edge.
Do not push the saw faster than the blade can comfortably cut.
The biggest enemy is usually heat combined with vibration.
A rigidly supported sheet vibrates less, which means the blade behaves more predictably and the edge is less likely to chip.
Cutting Plexiglass With a Table Saw
If you have a table saw, it can produce very accurate straight cuts, especially when several pieces need to be cut to matching dimensions.
Before cutting:
- Use an appropriate fine-tooth blade.
- Make sure the sheet is properly supported.
- Keep the protective film on.
- Set up a reliable fence.
- Make sure the material can move smoothly through the cut.
- Wear appropriate eye protection.
For repeated cuts, a table saw can save considerable time because you can maintain a consistent setup rather than measuring every piece from scratch.
However, do not assume that a table saw automatically produces a perfect acrylic edge. Blade selection and feed rate still make a major difference.
What Is the Best Way to Cut Plexiglass?
There is no single best method for every situation.
| Method | Best for | Main advantage |
|---|---|---|
| Scoring and snapping | Thin, straight pieces | Simple and inexpensive |
| Jigsaw | Curves and cutouts | Flexible shapes |
| Circular saw | Long straight cuts | Fast and practical |
| Table saw | Repeated straight cuts | Accuracy and consistency |
| Hand saw | Small projects | No power tool required |
For a thin rectangular panel, I would generally choose scoring and snapping.
For a curved panel or a hole-like cutout, a jigsaw makes more sense.
For a large sheet that needs to be divided into several straight sections, a circular saw or table saw is usually more efficient.
How to Prevent Plexiglass From Cracking
Cracking is usually caused by stress, vibration, poor support, or excessive force.
Here are several ways to reduce the risk:
Support the sheet properly
Do not allow a large section of acrylic to hang unsupported while cutting.
A sheet that flexes excessively can vibrate against the blade and develop cracks.
Avoid forcing the blade
If the blade feels like it is struggling, do not simply push harder.
Stop and check the blade, cutting speed, material support, and setup.
Protect drilled or cut areas
If you are cutting a panel that will later be drilled, keep enough distance between holes and edges. Acrylic becomes more vulnerable to cracking when holes or cuts are placed too close together.
Keep the sheet at a comfortable temperature
Avoid cutting acrylic that has been sitting in extreme heat or cold when possible. Sudden temperature changes can increase material stress.
A Less-Obvious Tip: Cut Slightly Oversized First
For precision work, one useful approach is to make the first cut slightly larger than the final dimension.
You can then trim the edge gradually.
This is particularly helpful when the final edge will be visible. Removing a small amount during a finishing pass gives you more control than trying to make the perfect cut in one attempt.
It also gives you a margin for correcting a small measurement error.
The key is to leave enough material for the final adjustment without creating unnecessary waste.
How to Get a Smooth Plexiglass Edge
After cutting, the edge may look cloudy, rough, or slightly uneven.
For most home projects, sanding is enough.
Start with a suitable medium-fine abrasive and work toward a finer grit as needed.
Sand evenly along the edge rather than concentrating on one spot.
For a decorative edge, additional polishing may be possible, but be careful with methods that generate heat. Excessive heat can distort or soften acrylic.
One useful principle is:
A smooth edge usually comes from controlled preparation, not aggressive finishing.
If the saw cut is badly melted or chipped, sanding can improve it, but it cannot always completely hide a poor cut.
Common Mistakes When Cutting Acrylic
1. Removing the protective film too early
This makes scratches much easier to create.
Keep the film on until most cutting and fitting work is finished.
2. Using a dull blade
A dull blade creates more friction and heat.
If you have to force the tool through the material, the blade or setup deserves attention.
3. Cutting without securing the sheet
A moving sheet can produce inaccurate cuts and dangerous tool movement.
Always stabilize the material.
4. Cutting too quickly
Fast does not necessarily mean efficient.
An aggressive feed rate can cause vibration, rough edges, or an inaccurate cut.
5. Pushing too slowly
The opposite problem can also occur. A blade rubbing against acrylic without efficiently removing material can generate substantial heat.
Find a steady feed rate where the blade cuts rather than drags.
6. Measuring from an inconsistent reference point
Always measure from a known edge.
If you measure from different sides or from slightly different points on the sheet, small errors accumulate.
7. Treating acrylic like glass
Plexiglass looks like glass but behaves very differently.
Do not use glass-cutting techniques simply because the material is transparent. Acrylic is a thermoplastic and responds to heat, friction, and mechanical stress differently.
How to Cut a Plexiglass Circle or Curve
Curved cuts are usually easier with a jigsaw.
First create a clear template. Then transfer the shape onto the protective film.
Secure the sheet so it cannot rotate or bounce while cutting.
For tight curves, do not force the blade sideways. Make relief cuts where appropriate, allowing small sections of waste material to be removed progressively.
This reduces the amount of material the blade has to turn through at once.
For a large circular panel, another practical option is to make a template and use a suitable guided cutting setup, but beginners should prioritize stable workholding and controlled cutting over speed.
What Safety Precautions Should You Take?
Even though acrylic is not glass, cutting it still creates hazards.
Wear safety glasses whenever using cutting tools.
You should also:
- Secure loose clothing and hair.
- Keep hands away from the blade path.
- Use clamps rather than trying to hold the sheet beside the blade.
- Work in a well-ventilated area.
- Avoid breathing concentrated plastic dust.
- Follow the safety instructions for your specific power tool.
- Disconnect power before changing blades or adjusting equipment.
Do not use an improvised setup simply to save a few minutes. A stable work surface and proper clamping often make the cut both safer and cleaner.
Three Practical Insights That Make a Difference
Think about heat, not just cutting speed
Many beginners focus entirely on whether the blade is sharp enough. With acrylic, heat management is equally important.
A blade that cuts efficiently removes material instead of repeatedly rubbing against it. That difference can determine whether the edge stays clean or becomes melted and rough.
The support underneath matters more than people expect
Acrylic does not have to crack because the blade is wrong. Sometimes the real problem is that the sheet is vibrating.
Support the sheet close to the cutting area while still allowing the tool to move correctly. A stable sheet gives the blade a much easier job.
The first cut does not have to be the final cut
For projects where appearance matters, deliberately leave a small finishing allowance.
Make the rough cut first, check the fit, and then refine the edge. This is often more reliable than trying to achieve a perfect finished dimension in one pass.
Real-World Examples
Replacing a small window panel
If you are replacing a small broken glass panel with acrylic and the shape is rectangular, scoring and snapping may be sufficient for thin material.
Measure the frame carefully and leave appropriate clearance rather than forcing the acrylic into the opening.
Making a protective machine cover
For a thicker protective cover, a circular saw or table saw may be more appropriate.
Accuracy becomes more important because several pieces may need to meet at consistent angles.
Creating a custom shelf
A straight rectangular shelf can usually be cut efficiently with a circular saw or table saw.
After cutting, smooth the edges thoroughly because exposed acrylic edges can be surprisingly sharp.
Cutting a decorative shape
A jigsaw is generally the better choice for curves and unusual outlines.
Make a cardboard template first, especially if the finished shape needs to fit around an existing object.
Frequently Asked Questions
Can I cut plexiglass with a regular saw?
Yes, but the result depends heavily on the blade and the thickness of the acrylic. A fine-tooth blade suitable for plastic generally gives better control than a coarse wood-cutting blade. Keep the sheet firmly supported and avoid excessive pressure.
What is the easiest way to cut thin plexiglass at home?
For thin sheets requiring a straight cut, scoring and snapping is usually the simplest method. Make several consistent passes along the same line, support the sheet correctly, and snap it cleanly. Finish the edge with fine sandpaper if necessary.
Why does my plexiglass melt when I cut it?
Melting usually indicates excessive heat from friction. A dull or unsuitable blade, incorrect speed, poor feed rate, or inadequate cutting technique can contribute to the problem. Improve the blade and cutting setup rather than simply forcing the tool through the material.
Can you cut plexiglass without power tools?
Yes. Thin acrylic can often be cut using a scoring tool and a straightedge. A suitable hand saw can also be used, although it may require more patience and careful control to achieve a clean edge.
How do you cut plexiglass without cracking it?
Use a sharp, appropriate cutting tool, support the sheet well, and avoid excessive force. For scored cuts, make multiple consistent passes instead of trying to create the groove in one aggressive stroke. Vibration and stress are two of the biggest causes of unwanted cracks.
Should I remove the protective film before cutting plexiglass?
Usually, no. Leaving the protective film in place during cutting helps prevent scratches and gives you a convenient surface for marking measurements. Remove it after cutting and fitting are complete, unless your specific material or project requires otherwise.
Final Thoughts
Learning how to cut plexiglass at home is mostly about choosing the right technique and controlling the material. Thin sheets with straight cuts can often be scored and snapped, while thicker or more complicated pieces are better suited to a jigsaw, circular saw, or table saw.
The cleanest results usually come from three things: accurate measurement, stable support, and a cutting setup that controls heat and vibration. Do not rush the cut, and do not assume that more pressure will produce a better result.
If the project matters, make a test cut on a piece of scrap acrylic first. That short test can reveal whether your blade, speed, feed rate, and technique are working before you risk the material you actually need.