You can get neat, durable dip nails at home, but the result depends much more on prep and product control than on having perfect nail-art skills. If your first attempt looked bulky, uneven, or started lifting within a few days, you probably did not do anything “wrong” in a major way—the most common problems are applying too much powder, getting product on the skin, or sealing the layers before they are properly set.
Learning how to do dip nails at home is mainly about building a repeatable routine. You need clean, dry nails, thin layers, careful powder application, and enough curing time between steps. Once those habits become automatic, the process becomes much easier and faster.
This guide walks you through the entire process, from preparing your natural nails to shaping, activating, and finishing your manicure. It also explains what to do when dip nails lift, crack, look too thick, or refuse to dry properly.
What Are Dip Nails?
Dip powder nails use a resin-like base, colored powder, and activator to create a hard coating over the natural nail. Unlike traditional polish, the color comes largely from the powder itself.
A typical dip system involves:
- Base coat: Creates the sticky surface that holds the powder.
- Dip powder: Provides color and structure.
- Activator: Hardens the layers so they can be shaped and finished.
- Top coat: Creates the final smooth, glossy surface.
The finished manicure is generally thicker and more durable than ordinary nail polish, but it can be thinner-looking than some acrylic enhancements when applied correctly.
What You Need to Do Dip Nails at Home
Before starting, gather everything you will need. Stopping halfway through the process with wet product on your nails is a recipe for uneven results.
Basic dip powder supplies
You will need:
- Dip powder system
- Base resin
- Activator
- Top coat
- Nail file
- Fine buffer
- Nail brush or soft manicure brush
- Lint-free wipes
- Nail dehydrator or alcohol, depending on your system
- Cuticle pusher
- Small cleanup brush
- Paper towel or disposable work surface
A good beginner setup does not need dozens of products. A compatible three-step dip system is usually easier to learn than mixing products from several brands.
One important preparation tip
Read the instructions supplied with your particular dip system. Activator strength, drying times, and brush instructions can differ. The goal is not to force every product into the same routine.
How to Do Dip Nails at Home Step by Step
The easiest way to get consistent results is to treat the manicure as a sequence rather than rushing through it.
1. Start with clean, dry nails
Remove old polish and wash your hands. Dry your nails thoroughly.
Push back the cuticles gently and remove only loose tissue from the nail plate. Avoid aggressively cutting or scraping the cuticle area.
Then lightly remove surface shine with a fine buffer if your system recommends it.
Do not heavily rough up the natural nail. You only need enough preparation to remove surface oils and improve adhesion. Excessive filing can leave your nails thin and sensitive.
2. Shape your nails before applying powder
Choose your desired shape—round, oval, square, squoval, or almond—and file the free edge now.
This is easier than trying to reshape the nail after several layers of hardened powder have been applied.
For a beginner, a shorter squoval or rounded shape is particularly forgiving because small imperfections are less obvious.
3. Dehydrate the nail plate
Use the dehydrator or preparation product recommended by your dip system.
The purpose is to remove temporary moisture and oil from the nail surface.
This step matters more than many beginners realize. A beautifully applied dip manicure can still lift prematurely if the nail plate was oily or damp when the base was applied.
Practical insight: Try not to apply hand cream immediately before doing dip nails. Even a small amount of residue around the nail can interfere with adhesion.
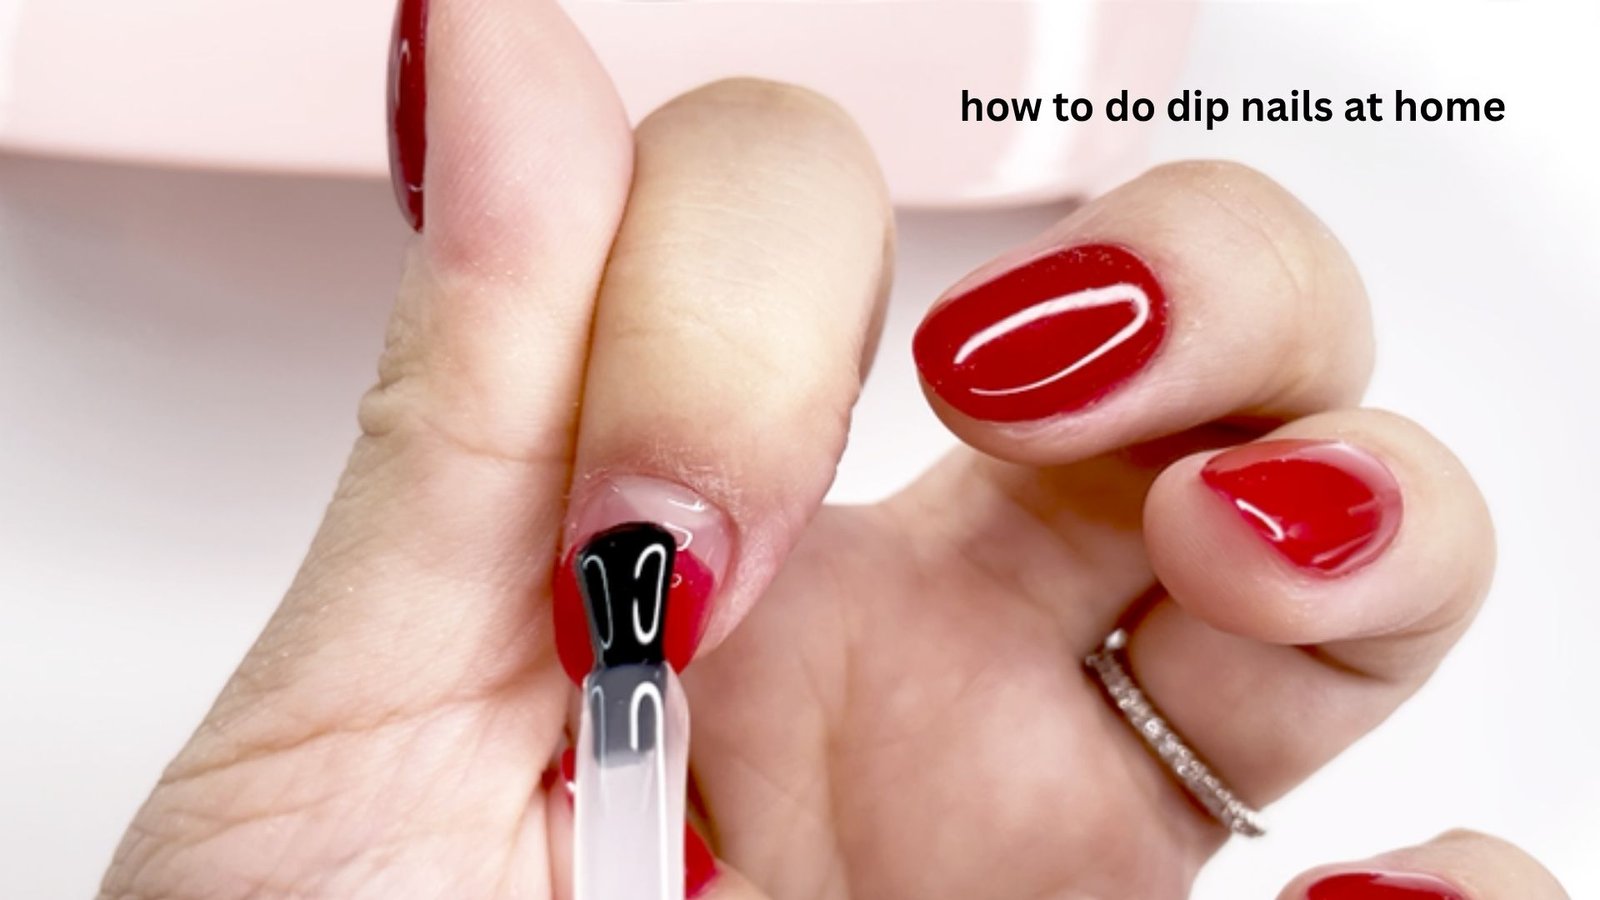
4. Apply a very thin layer of base
This is where many first-time users go wrong.
Apply the base to one nail in a thin, controlled layer. Leave a tiny margin around the cuticle rather than brushing directly into the skin.
Think of the base as paint, not glue. You want enough to create an even adhesive surface, but not so much that the powder forms a thick ridge.
Immediately move to the powder step according to your system’s instructions.
5. Dip the nail into the powder
Dip the nail into the colored powder, usually with the nail positioned according to the manufacturer’s instructions.
Remove it and gently tap away excess powder.
If your system uses a pour-over technique instead, pour the powder over the nail rather than dipping.
Repeat the base-and-powder process until you have the coverage and strength you want.
Usually, thin layers are better than trying to achieve everything in one heavy application.
6. Pay special attention to the cuticle area
A common beginner mistake is creating a thick mound near the cuticle.
Instead, keep the product slightly away from the skin and concentrate the structure over the nail itself.
A useful technique is to apply the first layer over most of the nail while keeping a wider margin near the cuticle. On the next layer, work slightly closer to the cuticle without touching it.
This creates a more natural-looking transition.
7. Remove excess powder
After each application, brush away loose powder carefully.
Do not aggressively scrub the surface immediately after applying the base and powder. You want to remove loose material without disturbing the layer underneath.
Keeping the surrounding skin clean also makes the finished manicure look dramatically more professional.
How Many Layers of Dip Powder Should You Use?
There is no universal number because nail length, powder type, and desired strength all matter.
For many people, two or three thin applications provide a good starting point.
You may need additional structure if:
- Your nails are long.
- Your nails are prone to bending.
- You are building an extension.
- The powder is being applied very thinly.
More powder is not automatically better. A thick manicure can become uncomfortable, difficult to shape, and more likely to look artificial.
8. Apply Activator
Once the powder layers are complete, apply the activator thoroughly according to your system’s instructions.
The activator is what hardens the dip material so it can be filed and finished.
Give it enough time to work. Rushing this stage can cause problems during filing and can also interfere with the final top coat.
If the surface still feels soft or seems to move under pressure, don’t start aggressive filing yet.
9. File and Shape the Dip Nails
Now refine the shape.
Start with the sidewalls and free edge, then smooth the top surface. Use controlled strokes rather than repeatedly filing one small area.
Your goal is to create:
- Straight or symmetrical sidewalls
- A smooth apex
- A clean cuticle transition
- An even thickness
- A consistent shape across all nails
How to avoid bulky dip nails
Look at the nail from several angles while filing.
A nail can look thin from above but still be very thick from the side. Checking the profile helps you catch this before applying the top coat.
The highest point of the nail should provide strength without creating an obvious hump.
Unique insight: Instead of asking, “Does this nail look thin?” ask, “Does the thickness change gradually from cuticle to free edge?” A gradual transition usually looks much more natural than simply making the entire nail extremely thin.
10. Apply Activator Again if Your System Requires It
Many dip systems call for another activator application after filing and before the top coat.
Follow the product directions carefully here.
Allow the activator to work for the recommended time and remove or wipe away residue if the instructions require it.
Do not improvise with incompatible liquids or random drying products.
11. Apply the Top Coat
Apply a thin, even layer of top coat.
Try to avoid flooding the cuticle area. Keep the brush moving smoothly across the nail.
Depending on the system, you may need a second coat.
Allow the top coat to dry fully before using your hands normally.
The final surface should be smooth, glossy, and free from visible ridges.
What If Your Dip Nails Lift After a Few Days?
Lifting is one of the most frustrating problems with at-home dip manicures.
Common causes include:
- Oil or moisture left on the nail
- Product touching the skin
- Too much base
- Inadequate activation
- Layers that are too thick
- Picking or peeling the manicure
- Filing the natural nail too aggressively beforehand
If lifting happens repeatedly at the same area—especially around the cuticle—look closely at your application technique.
Product touching the skin is particularly important. Once the dip material grows out slightly, that edge can create a weak point where lifting begins.
Why Are My Dip Nails Cracking?
Cracking can happen when the manicure is too thin, too thick, improperly shaped, or subjected to repeated stress.
Long nails are naturally exposed to more leverage. If you use your nails to open packages, scrape labels, or pry things open, even a well-applied manicure can crack.
If your nails repeatedly crack at the same location, consider shortening them slightly and building a smoother, more balanced structure.
Why Do My Dip Nails Look Thick?
Usually, the problem is too much product.
Common causes include:
- Applying heavy base coats
- Using too many layers
- Allowing powder to build up near the cuticle
- Not removing enough excess powder
- Under-filing after activation
Don’t solve thickness by aggressively filing the natural nail underneath. File the cured product instead, using controlled movements.
How to Remove Dip Nails at Home Safely
Do not peel or rip dip powder from your natural nails.
Peeling can take layers of the natural nail with it, leaving the surface rough and weak.
A common removal process involves:
- File away much of the shiny top layer.
- Soak the remaining product in acetone according to your system’s instructions.
- Give the product enough time to soften.
- Gently remove softened material.
- Repeat soaking if necessary rather than scraping aggressively.
- Wash and moisturize your hands afterward.
The exact removal time varies considerably with the products and thickness involved.
Unique insight: The safest removal is usually the least dramatic one. If the product isn’t soft enough to wipe away easily, more soaking is generally preferable to more force.
Dip Powder vs. Gel Polish vs. Acrylic
Each system has advantages.
| Feature | Dip Powder | Gel Polish | Acrylic |
|---|---|---|---|
| Application difficulty | Moderate | Easier | More advanced |
| Typical durability | High | Moderate–high | High |
| Odor | Can have noticeable resin odor | Usually lower | Often strong |
| Requires curing lamp | Usually no | Usually yes | No |
| Can add significant length | With suitable system | Limited | Yes |
| At-home learning curve | Moderate | Relatively easy | Higher |
Dip powder is a useful middle ground for someone who wants more durability than regular polish but doesn’t want to learn traditional acrylic application.
Common Dip Nail Mistakes to Avoid
Applying product onto the skin
This is one of the biggest causes of messy-looking manicures and can contribute to lifting.
Using thick layers
Thin, controlled applications produce better structure and are easier to correct.
Skipping nail preparation
A few extra minutes spent cleaning and preparing the nail can make a major difference in wear time.
Filing the natural nail too much
More filing does not necessarily mean better adhesion.
Rushing the activator
If the material isn’t properly hardened, filing and top-coat application can become difficult.
Peeling off old dip
Even if it seems satisfying, removal by force can damage the natural nail surface.
A Simple Routine for Better Results
If you’re doing dip nails at home for the first time, use this checklist:
- Clean and dry your nails.
- Gently prepare the cuticle area.
- Shape the nails.
- Dehydrate according to your system.
- Apply a thin base layer.
- Apply powder.
- Remove excess powder.
- Repeat thin layers as needed.
- Apply activator.
- File and shape.
- Apply any required second activator layer.
- Apply top coat.
- Allow everything to dry or set completely.
The biggest improvement usually comes from slowing down during the base application, not from buying more products.
FAQ
Can a beginner do dip nails at home?
Yes. Dip powder is relatively approachable for beginners because you do not need to sculpt liquid acrylic. The most difficult parts are controlling the amount of base, keeping product away from the skin, and shaping the finished nail evenly. Expect your first few manicures to take longer while you learn how much product your system needs.
How long do dip nails last at home?
Dip manicures commonly last around two to three weeks when applied and maintained properly, although individual results vary. Nail growth, preparation, product quality, daily activities, and removal technique all affect longevity. If yours consistently lift after only a few days, focus on preparation and application before assuming you need a different powder.
Can you do dip nails on short natural nails?
Yes. Dip powder works particularly well on short natural nails. In fact, shorter nails can be easier for beginners because there is less length to shape and less leverage on the product. Keep the edges smooth and avoid building unnecessary thickness.
How do you do dip nails at home without making them thick?
Use thin base layers and remove loose powder between applications. Avoid building large amounts of product around the cuticle and inspect the nail from the side while shaping it. It is usually easier to add another thin layer for strength than to correct a thick, bulky manicure later.
How often can you do dip powder nails?
There is no single schedule that works for everyone. The important issue is the condition of your natural nails and how gently you remove the previous manicure. If your nails become unusually thin, sore, peeling, or damaged, stop applying enhancements and allow them to recover.
Final Thoughts
Learning how to do dip nails at home becomes much easier once you stop treating the process as a race to get the color on. Preparation, thin layers, clean edges, proper activation, and patient removal have a bigger impact on the final result than complicated techniques.
If your first manicure isn’t perfect, don’t immediately change your entire product setup. Look at where the problem occurred: lifting usually points toward preparation or skin contact, thickness points toward product control, and cracking can point toward structure or excessive length.
Master those fundamentals, and your at-home dip manicures can become faster, cleaner, and much more consistent.