Changing your hair color can be exciting, but doing it yourself often feels intimidating. Many people worry about ending up with uneven color, stained skin, damaged hair, or a shade that looks nothing like the one on the box. If you’ve ever wondered how to dye hair at home without making costly mistakes, you’re not alone. The good news is that with the right preparation, realistic expectations, and a few professional techniques, home hair coloring can deliver beautiful, salon-worthy results.
Whether you’re covering gray hair, refreshing faded color, trying a richer brunette, or experimenting with a bold new look, this guide walks you through every step of the process. You’ll learn how to choose the right hair dye, prepare your hair, apply color evenly, avoid common mistakes, and care for your freshly dyed hair so it stays vibrant longer.
More importantly, you’ll discover practical tips that experienced home color users and professional stylists rely on—details that are often overlooked but can make the difference between a color you love and one you regret.
Why More People Are Dyeing Their Hair at Home
Home hair coloring has improved dramatically over the past decade. Modern formulas are easier to apply, gentler on hair, and available in a wider range of shades than ever before.
People choose to color their hair at home because it offers:
- Significant cost savings
- Flexible scheduling
- Easy gray coverage
- Quick color refreshes between salon visits
- Freedom to experiment with new shades
However, success depends far more on technique than on buying the most expensive product.
Before You Dye Your Hair: Preparation Matters
Professional-looking results begin before you even open the dye box.
Choose the Right Hair Dye
Different types of hair dye serve different purposes.
Permanent Hair Color
Best for:
- Gray coverage
- Long-lasting color
- Major color changes
Demi-Permanent Color
Ideal for:
- Blending gray hair
- Refreshing faded color
- Adding shine
Semi-Permanent Color
Great for:
- First-time users
- Fashion colors
- Minimal damage
Knowing which formula matches your goal helps prevent disappointment.
Pick the Right Shade
One of the biggest mistakes people make is choosing a color based only on the model shown on the packaging.
Instead, consider:
- Your current hair color
- Natural undertones
- Previous coloring history
- Skin tone
- Maintenance level
If you’re uncertain, stay within one or two shades of your natural hair color for the most predictable results.
Perform a Patch Test
Never skip this step.
Apply a small amount of dye behind your ear or inside your elbow 48 hours before coloring to check for allergic reactions.
Even if you’ve used the same brand before, formulas occasionally change.
Don’t Wash Your Hair Immediately Before Coloring
Contrary to popular belief, slightly dirty hair often colors better.
Natural scalp oils help protect your skin during processing.
Aim to wash your hair about 24 to 48 hours before dyeing.
What You’ll Need
Gather everything before you begin:
- Hair dye kit
- Gloves
- Old towel
- Hair clips
- Wide-tooth comb
- Petroleum jelly
- Timer
- Mirror
- Color-safe shampoo and conditioner
Preparation prevents unnecessary stress once the coloring process starts.
Step-by-Step Guide: How to Dye Hair at Home
Step 1: Protect Your Skin and Clothing
Wear old clothing.
Apply petroleum jelly around:
- Hairline
- Ears
- Neck
This helps prevent stubborn dye stains.
Step 2: Divide Hair Into Sections
Professional stylists rarely color hair randomly.
Instead, divide hair into four sections:
- Front left
- Front right
- Back left
- Back right
Secure each section with clips.
This simple step creates more even coverage.
Step 3: Mix the Hair Dye Correctly
Always follow the manufacturer’s instructions.
Don’t save leftover mixed dye for future use.
Once activated, the chemical reaction begins immediately.
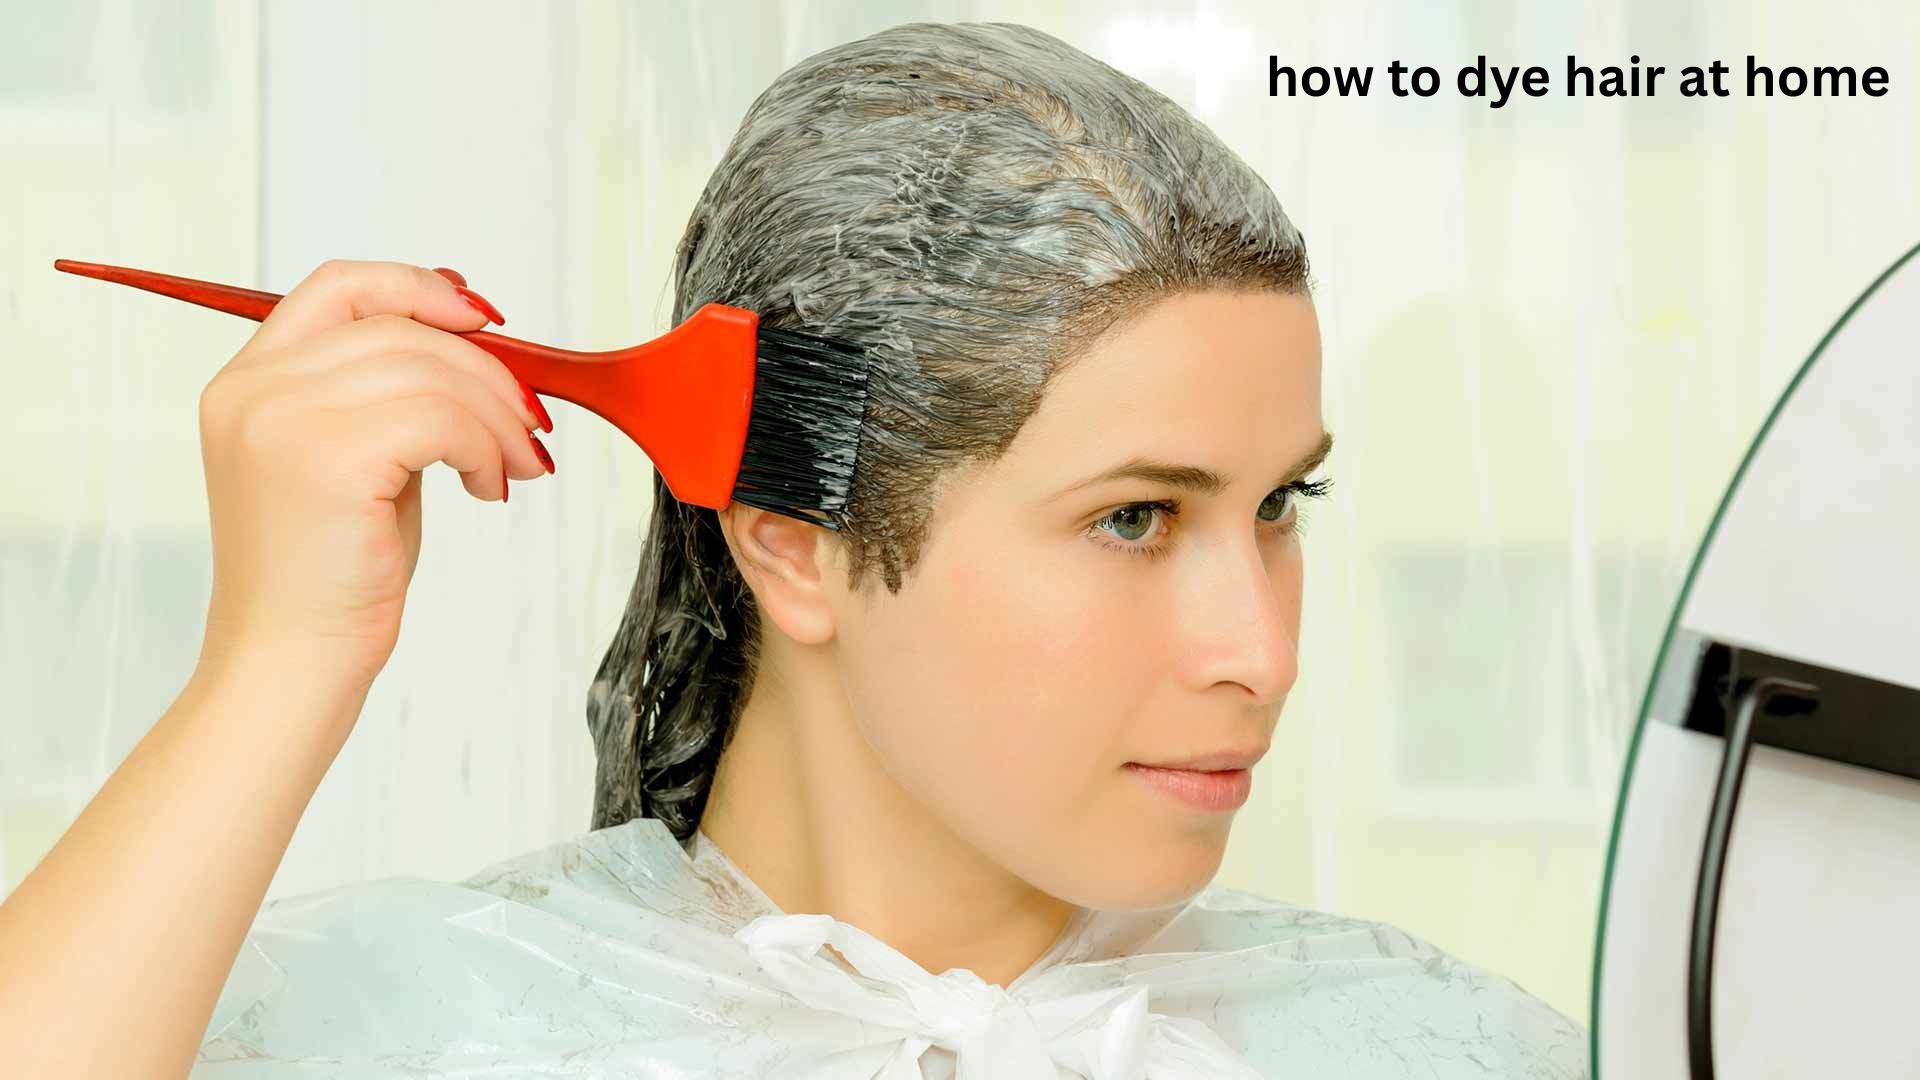
Step 4: Apply Dye Strategically
Application depends on your goal.
For Gray Root Coverage
Start where gray hair is most noticeable.
Usually:
- Hairline
- Part line
- Temples
For Full Hair Color
If this is your first time coloring virgin hair:
- Apply color to mid-lengths first
- Leave roots until the final 15–20 minutes
Roots process faster because body heat speeds up color development.
This is one of the biggest professional secrets that many beginners don’t know.
For Root Touch-Ups
Only apply dye to new growth.
Pulling permanent color through previously colored hair every time can cause unnecessary damage and color buildup.
Step 5: Process for the Recommended Time
More time does not equal better color.
Leaving dye on longer than directed can increase dryness without improving results.
Use a timer.
Step 6: Rinse Thoroughly
Rinse using lukewarm water until the water runs clear.
Avoid hot water.
Most kits include a conditioner designed specifically to seal the hair cuticle after coloring.
Use it.
Common Mistakes to Avoid
Even experienced home users occasionally make these mistakes.
Choosing a Color That’s Too Different
Jumping from black to blonde or blonde to black in one session often produces uneven results.
Major color transformations usually require multiple stages.
Ignoring Hair History
Previously colored hair reacts differently than virgin hair.
Old dye, highlights, bleach, and chemical treatments all influence the final shade.
Applying Dye Unevenly
Rushing often causes:
- Missed spots
- Patchiness
- Uneven roots
Take your time.
Small sections create better results.
Skipping Strand Tests
Testing one hidden section lets you preview:
- Final color
- Processing time
- Hair condition afterward
It’s a simple precaution that can prevent major disappointment.
Coloring Damaged Hair
Very dry or heavily damaged hair absorbs pigment unevenly.
If hair feels brittle, spend a few weeks restoring moisture before coloring.
How to Cover Gray Hair Successfully
Gray hair often resists color because it lacks natural pigment.
For better coverage:
- Choose permanent color
- Allow full processing time
- Start applying where gray is most concentrated
- Select shades labeled specifically for gray coverage
If gray hair is especially resistant, warming the room slightly can help processing remain consistent.
How Long Does Hair Dye Last?
Average longevity depends on the type of dye.
| Dye Type | Lasts |
|---|---|
| Semi-permanent | 6–12 washes |
| Demi-permanent | 20–28 washes |
| Permanent | Until new growth appears |
Color fading varies based on:
- Washing frequency
- Water temperature
- Sun exposure
- Heat styling
- Hair porosity
How to Make Hair Color Last Longer
Fresh color fades faster when hair isn’t cared for properly.
To extend color life:
- Wait at least 48 hours before shampooing.
- Use sulfate-free shampoo.
- Wash hair less frequently.
- Rinse with cool or lukewarm water.
- Limit heat styling.
- Use heat protectant before blow drying.
- Deep-condition weekly.
- Protect hair from chlorine and excessive sun exposure.
Small changes to your routine can preserve color for several extra weeks.
Unique Professional Tips Most Guides Don’t Mention
Hair Porosity Matters More Than Hair Thickness
Many people think thick hair always needs more processing time.
In reality, porosity has a much greater impact.
Highly porous hair absorbs color rapidly but also fades faster.
Low-porosity hair may require more careful saturation because it resists absorbing dye evenly.
Understanding your hair’s porosity helps explain why the same dye can produce different results on different people.
Your Bathroom Lighting Can Trick You
Hair color often looks completely different depending on the lighting.
Warm indoor lights can make hair appear richer and darker.
Natural daylight provides the most accurate representation of your new color.
Before deciding whether your color turned out “wrong,” check it in multiple lighting conditions.
Water Quality Can Affect Color Longevity
Hard water contains minerals that gradually dull freshly colored hair.
If your home has hard water, using a clarifying treatment occasionally—or installing a shower filter—may help maintain brightness longer.
This often explains why some people experience faster fading despite using high-quality hair products.
When You Should Visit a Professional Instead
Home coloring isn’t the best option for every situation.
Consider professional help if you want to:
- Go from dark brown to platinum blonde
- Correct orange or green tones
- Remove years of black dye
- Repair severe color mistakes
- Create complex balayage or highlights
These services require advanced techniques and specialized products.
Troubleshooting Common Problems
My Hair Turned Too Dark
Wait several washes before panicking.
Fresh color usually softens slightly after a week.
My Roots Are Lighter Than the Rest
This happens because roots process faster.
Future applications should leave roots until later in the process if coloring virgin hair.
I Missed Spots
Allow your hair to rest before reapplying permanent dye.
Spot corrections should only target missed areas rather than recoloring the entire head immediately.
My Hair Feels Dry
Restore moisture with:
- Deep conditioning treatments
- Protein masks if needed
- Leave-in conditioners
- Reduced heat styling
Healthy hair holds color better over time.
FAQ
Can I dye my hair at home if I’ve never done it before?
Yes. Many beginners achieve excellent results by choosing a shade close to their natural color and carefully following the instructions. Performing a strand test first helps build confidence and gives you a preview of the final result. Taking your time is more important than rushing through the process.
Should I dye clean or dirty hair?
Hair that was washed one or two days before coloring is usually ideal. Natural scalp oils provide a protective barrier while allowing the dye to penetrate effectively. Avoid applying heavy styling products before coloring, as they may interfere with even coverage.
How often is it safe to dye hair at home?
Most permanent root touch-ups can be done every four to six weeks. Coloring more frequently may increase dryness and damage, especially if you’re repeatedly applying permanent dye over previously colored lengths. Refreshing only new growth helps keep hair healthier.
What should I do if my hair color turns out too dark?
Don’t immediately recolor your hair. Permanent color often softens slightly after several washes. Using a clarifying shampoo occasionally may help speed up gentle fading, but avoid harsh stripping methods that can damage your hair.
Can I dye my hair after bleaching it?
Yes, but timing matters. Bleached hair is more porous and absorbs color differently than untreated hair. Conditioning treatments before coloring and selecting the appropriate toner or shade can improve the final result and reduce unevenness.
Is box dye as good as salon hair color?
Modern box dyes can produce impressive results for many people, particularly for gray coverage, root touch-ups, and subtle color changes. However, salon professionals customize formulas based on your hair type, history, and goals, making them a better choice for major transformations or complex color corrections.
Conclusion
Learning how to dye hair at home successfully is less about luck and more about preparation, patience, and understanding your hair. Choosing the right shade, applying color methodically, respecting processing times, and following a proper aftercare routine can dramatically improve your results while reducing the risk of damage or uneven color.
Perhaps the most valuable lesson is that every head of hair is different. Factors like porosity, previous color treatments, and even your water quality influence the final outcome. By paying attention to these often-overlooked details, you can achieve results that look natural, last longer, and keep your hair feeling healthy. Start with realistic expectations, take your time, and enjoy the confidence that comes with mastering your own at-home hair color routine.