


It’s a Sunday morning, and you are standing in the middle of your living room. Sunlight streams through the windows, casting a warm glow on the faded walls that have seen better days. You think back to when you first moved in—the room felt fresh and full of potential. But now, it’s lost its vibrancy, and those once-pristine walls are starting to look dull and worn. Today, though, things are going to change. Armed with a bucket of paint, rollers, and brushes, you’ve decided to transform this space into something new—a room that feels alive again, personalized to your taste. As you lay down your drop cloth, you realize that painting a room isn’t just a home improvement task; it’s an opportunity for renewal, a chance to breathe new life into the place you call home.
How to paint a room? Painting a room may seem like a simple DIY project, but achieving a professional-quality finish requires careful preparation and attention to detail. This guide will guide you through every step of painting a room, from gathering your supplies to adding the finishing touches. Along the way, we’ll sweep tips, stats, and expert insights to ensure your project succeeds.
Step 1: Choose Your Paint Color and Finish
Before gathering your tools, the first and arguably most important step is choosing the right paint color and finish for your room. The color you pick will set the tone for the entire space, affecting the room’s mood, lighting, and overall feel.
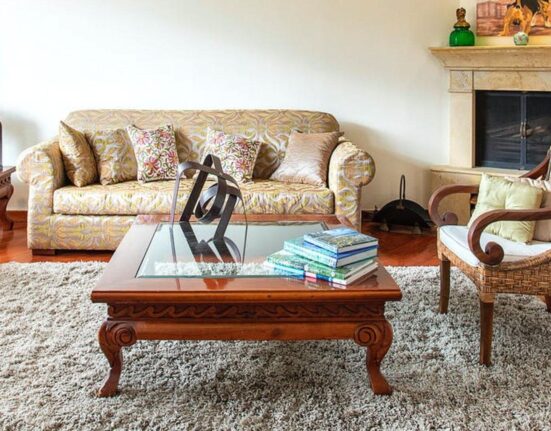
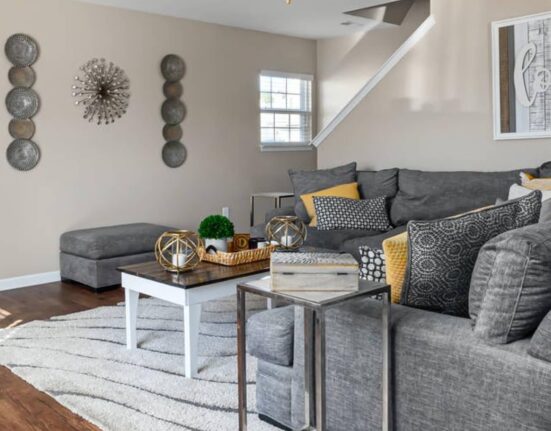
- Choosing a Color: It’s important to consider how a paint color will interact with natural light and the existing furniture in the room. Lighter shades can make a small room feel larger and more open, while darker colors can create a sense of coziness. According to a survey by Sherwin-Williams, the most popular interior paint colors in 2023 were shades of gray, white, and beige, as these neutral tones are versatile and work well in most spaces.
- Selecting a Finish: Paint finishes range from flat (matte) to high-gloss. Flat paints are ideal for ceilings or walls that aren’t smooth, as they can hide imperfections. On the other hand, eggshell or satin finishes provide a bit of sheen, making them a good choice for high-traffic areas. High-gloss paint, while more challenging to work with, offers a durable and easy-to-clean finish, perfect for trim or doors. According to Benjamin Moore, satin finishes are currently the most popular for walls because they provide a balanced, elegant, anthat’sble look.
Step 2: Gather Your Supplies
To achieve a professional-looking paint job, you’ll need the ryou’llools. Investing in quality brushes, rollers, and other materials can significantly improve your final result.
Basic Supplies:
- Paint (estimate 1 gallon for every 400 square feet of wall space)
- Paint roller and roller covers (choose a ⅜-inch nap for smooth surfaces)
- Brushes (angled sash brushes work best for cutting around edges)
- Painter’s tape
- DrPainter’s (to protect floors and furniture)
- Paint tray and liners
- Extension pole (for high or hard-to-reach areas)
- Spackle and putty knife (for filling holes or cracks)
- Sandpaper (for smoothing out patched areas)
- Stir sticks and a paint can opener.
- Ladder (for accessing higher spots)
The cost of supplies can vary widely, but HomeAdvisor reports that the average price of materials for a room painting project is between $200 and $300, depending on the room’s size and the Quality of the materials.
Step 3: Prep the Room
Preparation is critical to a successful paint job, and this step often takes longer than the painting itself. Skipping proper prep work can lead to uneven coverage, paint drips, or later peeling.
- Clear the Space: Start by removing as much furniture as possible from the room. Cover more oversized items, such as drop cloths or plastic sheeting that can’t be moved. Protect the floor by laying down a canvas or plastic drop cloth, ensuring no paint seeps through.
- Clean the Walls: Dirt, dust, and grease can prevent paint from adhering correctly. Clean the walls with a damp sponge or use a mild soap solution for particularly greasy areas (such as in the kitchen). Let the walls dry completely before proceeding.
- Repair Imperfections: Use spackle to fill nail holes, cracks, or other imperfections. After the spackle dries, sand it smooth with a fine-grit sandpaper. This step is crucial for achieving a flawless finish.
- Tape-Off Edges: Use painter’s tape to cover the base painter’s frames, light switches, and other areas where you want to keep paint off. Press the tape down firmly to avoid any paint seeping underneath.
Step 4: Priming the Walls
Primer isn’t always necessary, but it can help the paint adhere better and provide a more uniform finish in many cases. If you’re painting over a dark surface or a surface that hasn’t been painted in a time, applying a primer can prevent the old color from bleeding through and ensure even coverage.
According to The Paint Quality Institute, using primer can reduce the number of coats of paint needed by 30-50%, making it an intelligent step in any room-painting project. In many cases, a two-in-one paint and primer can save time, especially for surfaces that don’t require heavy-duty don’t.
Step 5: Start Painting
Now comes the fun part: painting! Follow these tips for a smooth, even coat.
- Cut in First: Use an angled brush to “cut in” around the room’s “edges. “this means painting the areas a roller can’t reach, such as the baseboards, can’t, and around windows and doors. According to Bob Vila, cutting in first helps create clean edges and reduces the risk of brush strokes appearing in the final result.
- Roll the Paint: Use a roller to paint the rest of the wall after cutting in. Work in small sections, using a “W” pattern to distribute even paint. Be careful not to overload the roller with paint, leading to drips and streaks.
- Apply Multiple Coats: Depending on the color and finish, you may need to apply two or three coats of paint for full coverage. Allow each coat to dry thoroughly before applying the next one. The Spruce recommends waiting at least two to four hours between coats, though this can vary depending on the humidity and temperature of the room.
Step 6: Clean Up and Add Finishing Touches
Once the paint has dried and you’re happy with the coverage, it’s time to remove the pain you’re taping and clean up. Slowly, it’s off the tape at a painter’s angle to avoid pulling up any paint. Touch up any spots where the paint may have bled through the tape or where coverage is uneven.
Clean your brushes and rollers immediately with soap and water (for latex paint) or paint thinner (for oil-based paint), and store them for future projects. Finally, let the room dry entirely before moving the furniture back in. Experts recommend waiting at least 24 hours before heavy use.
Bonus Tips for a Professional Finish
- Ventilation is Key: Make sure the room is well-ventilated while you paint to avoid inhaling fumes and to speed up drying time. Open windows, use fans, and, if necessary, wear a mask.
- Test the Color: Before committing to a whole gallon of paint, test a small swatch on your wall to see how it looks in different lighting. Consumer Reports suggests testing paint on multiple walls and observing how it changes throughout the day as natural light shifts.
- Choose Quality Paint: Cheap paint might save you money upfront, but it often requires more coats and doesn’t last as long. Consumer Reports also notes that high-quality paints have better coverage and durability, saving you time and money in the long run.
The Final Touch: Enjoy Your New Room!
Congratulations! You’ve successfully transformed your space with a fresh coaYou’veaint. Painting a room can initially seem intimidating, but with careful planning and attention to detail, anyone can achieve professional-quality results. Plus, as reported by HomeAdvisor, painting your home’s interior can increase its value by 2-5%, making it a worthwhile investment whether you plan to stay in your home or sell in the future.
From choosing the right color to executing the perfect paint job, painting a room is not just a task—it’s an opportunity to personalize your home and create a space that reflects your style. Now, step back and enjoy the fruits of your labor—your freshly painted room awaits!
 2")


